PenTest+ TTT

Couple of things if you are have GNS3 issues.

1) If you get a network adapter error when starting the GNS3 VM, go to settings and change adapter to the Virtual Box Host Only adapter you have.

2) If getting the KVM = False I discussed, you can try this fix:

https://stackoverflow.com/questions/54251855/virtualbox-enable-nested-vtx-amd-v-greyed-out

In a nutshell, after import of GNS3 VM to Vbox, open a command prompt then

change directory to:

C:\Program Files\Oracle\VirtualBox

Then issue:

vbonmanage modifyvm "GNS3 VM" --nested-hw-virt on

And/or check your CPU virtualization settings are on in the BIOS/UEFI.
Thanks for this link. My windows machine won't let me enable it, so I gave up on it. I'll have to try this out later today. At least I was able to get it working on a non-windows machine :)
 
  • Like
Reactions: Stephen Schneiter
How to: Enable Nested VT-x/AMD-V (Force enable Nested VT-x/AMD-V) in Oracle VM VirtualBox

I have been working on the greyed out option described above and below, it is tied to my having a new laptop purchased for teaching. Knowing that I use multiple VM's, a friend pushed me to use Hyper-V so I played around with it, was not too excited so installed VirtualBox (which I have been using for years at home, VMware for work). From what I read because I started Hyper-V, that created issues with VirtualBox . I had been running Kali on this machine for a while with no issues, only until I attempted to run GNS3 did I have issues. I knew GNS3 worked because I installed it on another machine. After searching around and trying many suggestions, the process below is the one that worked for me. The various Power Shell options did not do anything for my machine.

How to: Enable Nested VT-x/AMD-V (Force enable Nested VT-x/AMD-V) in Oracle VM VirtualBox
https://dannyda.com/2020/03/10/how-...le-nested-vt-x-amd-v-in-oracle-vm-virtualbox/

Method 2 – Edit configuration file

1 Find where the virtual machine stored (The one we want to modify), in this case, it’s “C:\Users\win10\Desktop\test-vm\test-vm”
2 Right click on “virtual machine name.vbox”, “tets-vm.vbox” in this case -> Open with… -> Notepad
3 Find following “CPU” section

Original
<CPU>
<PAE enabled="false"/>
<LongMode enabled="true"/>
<HardwareVirtExLargePages enabled="true"/>
</CPU>

Change to
<CPU>
<PAE enabled="false"/>
<NestedHWVirt enabled="true"/>
<LongMode enabled="true"/>
<HardwareVirtExLargePages enabled="true"/>
</CPU>

4 Now it’s done, we have enabled virtualization for that Virtual Machine.

Hope this can help as an optional method.
 
For those who would like another lab/testing environment option, I setup 4 Raspberry Pi 4s with ESXi and an ESXi host running vCenter to cluster. I have attached the instructions on how to setup ESXi on a Raspberry Pi. This was more about a creative lab option to have fun with the class and demonstrate virtualization.

Here are some notes:
1. All software used in the attached document is FREE. That's right, FREE. Links are in the document.
2. If you would like to download FREE versions of Microsoft Server from Microsoft, here you go: https://www.microsoft.com/en-us/evalcenter/evaluate-windows-server. These are 180 Evaluation version, but they work great for lab/testing environments. You can also get Windows 11 (ARM): https://www.microsoft.com/en-us/software-download/windows11.
3. All the Raspberry Pis will need ARM OSs for their VMs. These are available for most Linux distros and Windows 11.
4. If you want to cluster the ESXi Hosts (Raspberry Pis), you will need to setup a Desktop/Server ESXi host and download/install vCenter from VMWare (60 day FREE evaluation version). The Host will need to have a CPU compatible with ESXi, at least 12 GB of free RAM (less than 32GB of system RAM not recommended), and a 1TB HDD.
5. If you decide to cluster, you will also need a time server. I created a Windows Server 2019 time server on the Desktop ESXi host.
6. You will need another device with any browser to access the host. I used my laptop with Chrome.
7. Here is a h/w breakdown of what I used for this exercise:
1 Desktop with Ryzen 9 (16 Core/ 32 Thread) with 128 GM RAM, 1 TB SSD Drive, and 1 TB HDD
1 Linksys 8-port unmanaged switch and cables
1 Linksys router and cables
4 Raspberry Pi 4s (8GB Versions) (Each with a 32GB Micro-SD card and 128GB USB 3.1 Flash Drive)
1 KVM switch with keyboard, mouse, and monitor
8. Here is what I installed on each:
Desktop: ESXi, vCenter Server, Windows Server 2019, Windows 11, and Fedora Security
Raspberry Pi 1: ESXi with VMs: Kali and Ubuntu Server
Raspberry Pi 2: ESXi with VMs: Windows 11 (ARM) and Fedora Security
Raspberry Pi 3: ESXi with VMs: Fedora, Bunsenlabs, and Ubuntu Desktop
Raspberry Pi 4: ESXi with VMs: Retro Pi, Parrot OS

Here are some takeaways:
1. You can use just about any monitoring tool in the various OSs to practice security.
2. If you use a micro-SD with USB adapter instead of a USB Flash Drive, be very cautions. The VMs will be installed on the device and are used extensively. The adapters run very hot and most likely it will ruin your micro-SD card.
3. Since ESXi is managed via a browser, the KVM is optional. I used it, but had each student login via their desktop or my laptop.
4. Downloading each OS iso image to the laptop and uploading via browser to install each VM seemed to work best. I also downloaded vCenter on my laptop and set the Desktop ESXi host as my target for install. This is a 2 stage process and you will need to login to the server and complete configuration after stage 1 is done.
5. Ubuntu NTP Server for a time server on any Raspberry Pi VM works, but the Windows 2019 Server was about showing more VMs.
6. Setting up ESXi on a Raspberry Pi 4 using the attached instructions takes under 30 minutes. Setting up vCenter, the time server, and clustering/configuring for the first time takes a few hours. If you want to setup ESXi on a Raspberry Pi 4 and play with VMs, just login to the ESXi host with any browser.
7. Raspberry Pi's do not offer the greatest performance, but it was fun!
 

Attachments

  • Guide to Install ESXi on Raspberry Pi V4.zip
    1.7 MB · Views: 4
Here is an update for those who want to see full links in the document:

Current Raspberry Pi firmware: https://github.com/raspberrypi/firmware/archive/master.zip
UEFI Raspberry Pi firmware: https://github.com/pftf/RPi4/releases/download/v1.20/RPi4_UEFI_Firmware_v1.20.zip

If you ever want to know the full URL for a bit.ly link, just put a + at the end for the link. For example, the document uses https://bit.ly/3jota8D. If you use https://bitly.com/3jota8D+ instead, it will take you to a screen with the full URL of https://github.com/pftf/RPi4/releases/download/v1.20/RPi4_UEFI_Firmware_v1.20.zip
 
I have a question related to upcoming material in Pentest+. Section 5.3 calls out theHarvester as an OSINT tool. I seem to be having a problem. Does google block theHarvester searches if they are coming from residential IP Addresses? Can't seem to get any results when running basic and small (300 or 500) searches. Thought maybe it was an issue with my IP Address. Thanks!
 
I have a question related to upcoming material in Pentest+. Section 5.3 calls out theHarvester as an OSINT tool. I seem to be having a problem. Does google block theHarvester searches if they are coming from residential IP Addresses? Can't seem to get any results when running basic and small (300 or 500) searches. Thought maybe it was an issue with my IP Address. Thanks!
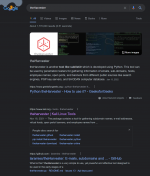
My search on Google came back with results, so it may be a local issue.

1644014570079.png
 
I have a question related to upcoming material in Pentest+. Section 5.3 calls out theHarvester as an OSINT tool. I seem to be having a problem. Does google block theHarvester searches if they are coming from residential IP Addresses? Can't seem to get any results when running basic and small (300 or 500) searches. Thought maybe it was an issue with my IP Address. Thanks!
I've not seen Google block it
 
  • Like
Reactions: Jeremiah Minner